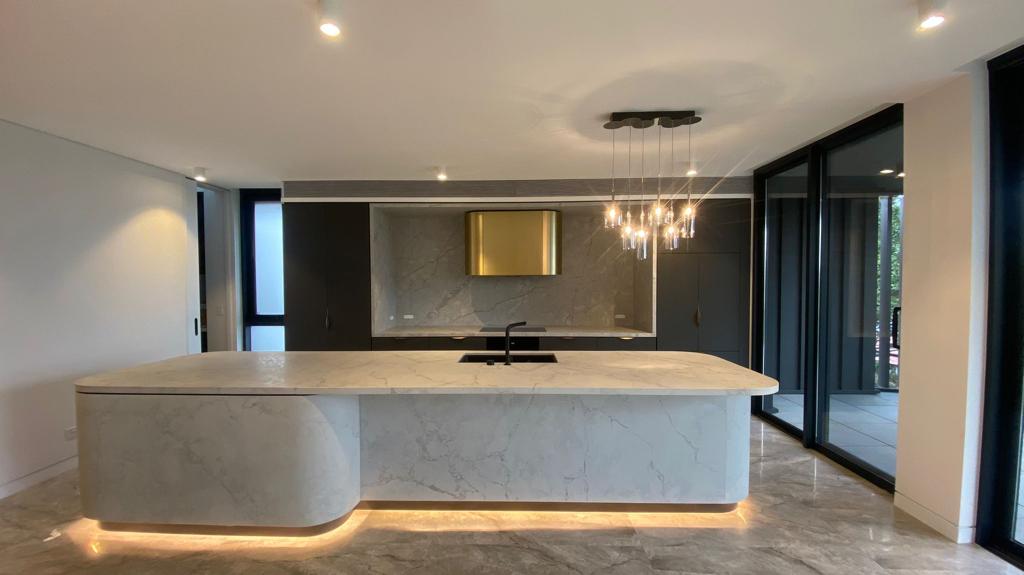
Are your kitchen walls becoming stained, or does your space feel outdated? It might be time to consider a splashback installation. Welcome to our comprehensive guide on the latest in glass and kitchen splashbacks that protect and enhance your kitchen’s aesthetics. Let’s explore how choosing the right splashback can transform your cooking space into a vibrant and modern culinary haven.
Exploring the Essentials of Splashback Installation
Splashback installation is vital in safeguarding your kitchen walls from everyday splashes, spills, and the intense heat generated during cooking sessions. This process commences with meticulous measurements of the area behind your cooktop or sink, ensuring an accurate fit for the splashback. Once dimensions are established, selecting the right material becomes pivotal, balancing functionality with aesthetic appeal.
Among the many options available, glass emerges as a popular choice due to its sleek appearance and easy maintenance. With the ability to customise colour and finish, glass splashbacks seamlessly integrate into any kitchen decor, offering practicality and style. However, other materials such as tiles, stainless steel, or stone can also be considered, each bringing unique charm to the kitchen space.
Choosing the right installer is paramount for achieving a flawless finish. Experienced professionals ensure precise handling and installation, ensuring seamless integration with your kitchen walls. With proper care and maintenance, a well-installed splashback enhances your kitchen’s visual appeal. It provides long-lasting protection against wear and tear, making it a worthwhile investment for homeowners.
Important Tips for a Successful Kitchen Splashback Installation
Adding a kitchen splashback not only uplifts the aesthetics of your kitchen but also enhances its functionality by protecting the walls from stains and heat damage. Here’s how you can ensure a seamless kitchen splashback installation:
Select the Right Material:
While Glass is a popular choice for its sleek appearance and ease of cleaning, other materials like ceramic tiles, stainless steel, and engineered stone offer unique benefits. For instance, ceramic tiles are available in many designs and are excellent for adding a customised touch. When choosing the material, consider factors such as heat resistance, maintenance, and the overall design theme of your kitchen.
Accurate Measurements:
Precision is key in the splashback installation process. Measure the space behind your cooktop and sink carefully, accounting for any slight irregularities in wall shape. This step ensures that the splashback fits perfectly, without any unsightly gaps or overlaps. It’s advisable to double-check measurements before cutting or ordering your splashback material.
Prepare the Wall Surface:
A clean, smooth, drywall surface is crucial for adequately adhering to the splashback. Remove any existing tiles, wallpaper, or loose paint. Fill in holes and sand down any uneven areas. Certain materials may require a primer to ensure a strong bond between the splashback and the wall.
Professional Installation:
While DIY installation might be tempting, hiring professionals is recommended for materials like Glass or stone, which require specific handling and cutting tools. Professional installers can also ensure the splashback is perfectly level and securely sealed, minimising the risk of damage or moisture seepage.
Sealing and Finishing:
After installing the splashback, it’s essential to seal edges, especially around sinks and cooktops, to prevent water and grease from seeping behind. Use a silicone sealant that matches the colour of your splashback, or opt for a precise variety for a neat finish. This not only enhances the durability of your splashback but also maintains the cleanliness of your kitchen walls.
Maintenance:
Understanding how to care for your splashback post-installation can keep it looking new for years. Glass and stainless steel typically require a wipe-down with a damp cloth and a mild cleaner. Tiled splashbacks might need occasional grout cleaning to prevent mould and staining.
By following these steps, your kitchen splashback installation will look professional and be a durable and stylish addition to your kitchen. Whether renovating your kitchen or updating its look, a well-chosen and perfectly installed splashback can significantly impact you.
Why Choose ATD Services as Your Glass Splashback Installers?
At ATD Services, we understand that a splashback is more than just a functional part of your kitchen—it’s a critical element of your home’s design. We offer tailored solutions to fit every kitchen’s unique style and needs. Our team of experienced glass splashback installers is committed to delivering high-quality, durable, and visually appealing installations.
Whether renovating your kitchen or simply updating its look, ATD Services is here to provide expert advice and installation services. We pride ourselves on our meticulous attention to detail and our dedication to customer satisfaction. Let us help you bring your kitchen vision to life with a stunning new splashback that complements your space perfectly.
